Using YouTube as a storage, the hard way
Starting the project
You probably know what I’m talking about. Get a file, convert it in a video, and upload it to YouTube. Dozens of people already done that, so it probably won’t be that hard, no? Well, if you want something that really works, it does.
I’ve read in Hacker News or Hackaday about this kind of projects, but I wondered why they either stopped solving some bugs or how nobody just made really “ready to use” tools, so I thought it would be fun to make them myself.
I started testing some libraries in Python without even approaching how some other projects were made, or what decision they took in order to solve some problems (and to be honest, I should have). I just played with Pillow to manage images and OpenCV to work with videos, nothing fancier.
The only thing I avoided before doing anything was using QR codes, as other people done, as they wasted a lot of space in every frame. In blank spaces, in alignment and positioning patters (the three big squares and the common small one), and also in its encoding, as include a lot of data redundancy. It is logic in a codification that need be read in different three-dimensional positions and with plenty of possible difficulties in its medium (like a dirty tag).
 Those are the different parts of a QR code. Look how much space is waste! Image courtesy of Bobmath, from Wikipedia
First approaches
My initial approach was the most simple, like the one used by Dzhang314’s YouTubeDrive, where they mapped the bytes in the input data as if they were the colour data from every pixel in the output image. This is really fast to program and to process, as you only have to make Pillow reinterpret binary data as if it were the bytes of a raw RGB image
At the time to make the video, I knew the bitrate of 1080p videos was limited in the upload from 8 Mb/s to 12 Mb/s, and I had to give to make a video with a chroma subsampling of 4:2:0. Knowing roughly how “more changes in the video is more bitrate” I just repeated the image for a known quantity of frames to make the video “more static”, and thus lowering that bitrate.
 Chroma subsampling. Courtesy of Mackenziemacaroni, from Wikipedia
Also, to make it even lower, and to comply with the chroma subsampling, I scaled every pixel by 2, making the colour squares 2x2 instead of 1x1 (which is really easy to do, just scale a 720p generated image to 1080p with a ‘nearest’ filter).
1
2
3
4
5
6
7
8
9
10
11
12
13
	BW,BH = 1920,1080
	W,H = int(BW/2), int(BH/2)
	repeatedFrames = 30

	# Interpret bytes from array as RGB values, making a 720p image, and then
	# resizes it to 1080p
	img = Image.frombuffer('RGB', (W,H), bytearray(pixelData))\
	.resize((BW,BH), Image.Resampling.NEAREST)

	# Insert 30 frames of the same image to the same OpenCVs VideoWriter stream
	for j in range(repeatedFrames):
		video.write(np.array(img))
But this approach has a big problem: When you convert it to a video, every lossless PNG frame becomes a lossy JPEG frame, which losses a lot of colour, and that means changing a lot of bytes.
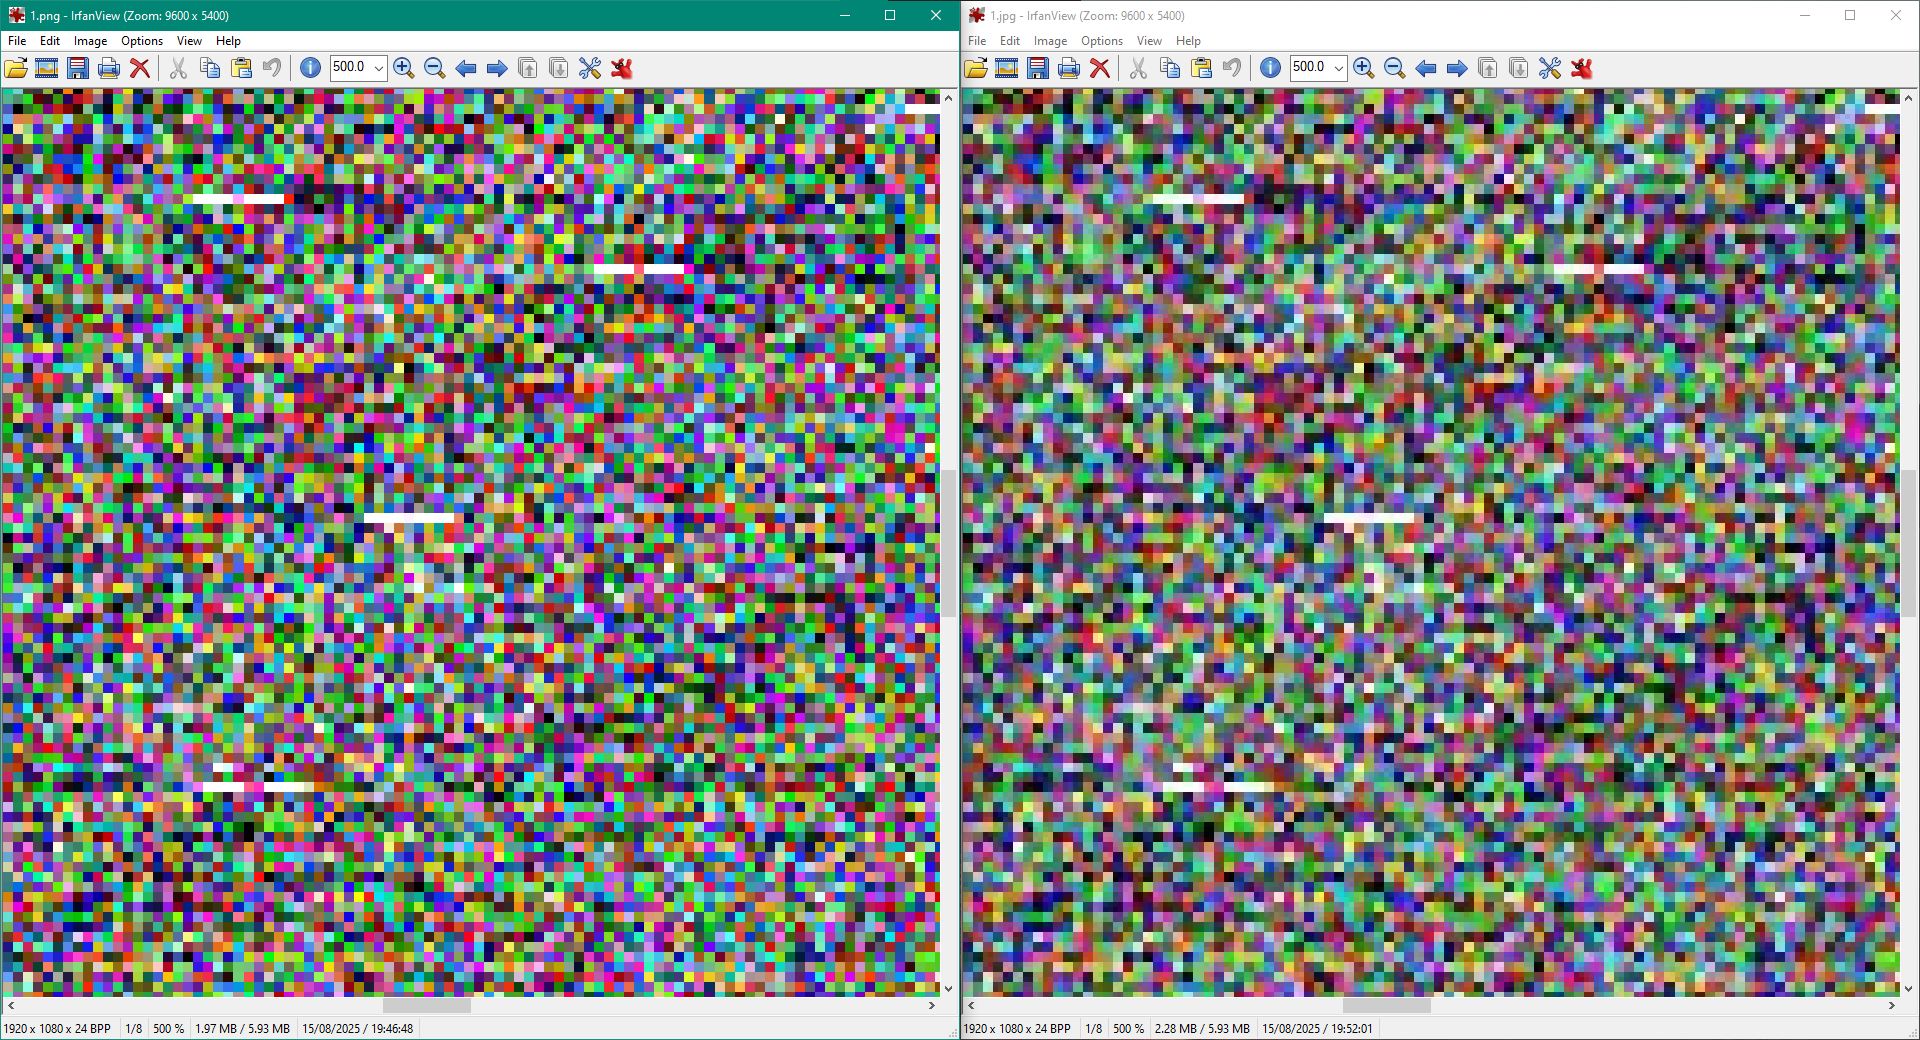 In the left, the frame generated in a lossless PNG format, and in the right, the same frame extracted from a h.264 compressed video at 12Mb/s. Even at simple sight, you can notice how the right image is blurrier than the other.
After comparing both images with ImageMagick compare tool, I get a 12.92% of distortion between pictures mathematically measured, so I need
This happens because lossy image compression algorithms give more importance to luminance (‘how strong the light is’) than chroma (‘what colour that light has’), as our eyes are more sensible to the first than the second. And why this is important to this? Because all the data stored as colour will be altered, but if we store in a grey scale format, probably won’t lose that much.
Now in grey scale
Changing the scripts from colour to greyscale wasn’t that difficult, it’s only a matter of telling Pillow to use only one channel and getting a third of the bytes per frame. After using the same ImageMagick compare tool, I get under 2% of difference between original images and extracted frames, so I’m more confident this configuration will be more suitable for this kind of use.
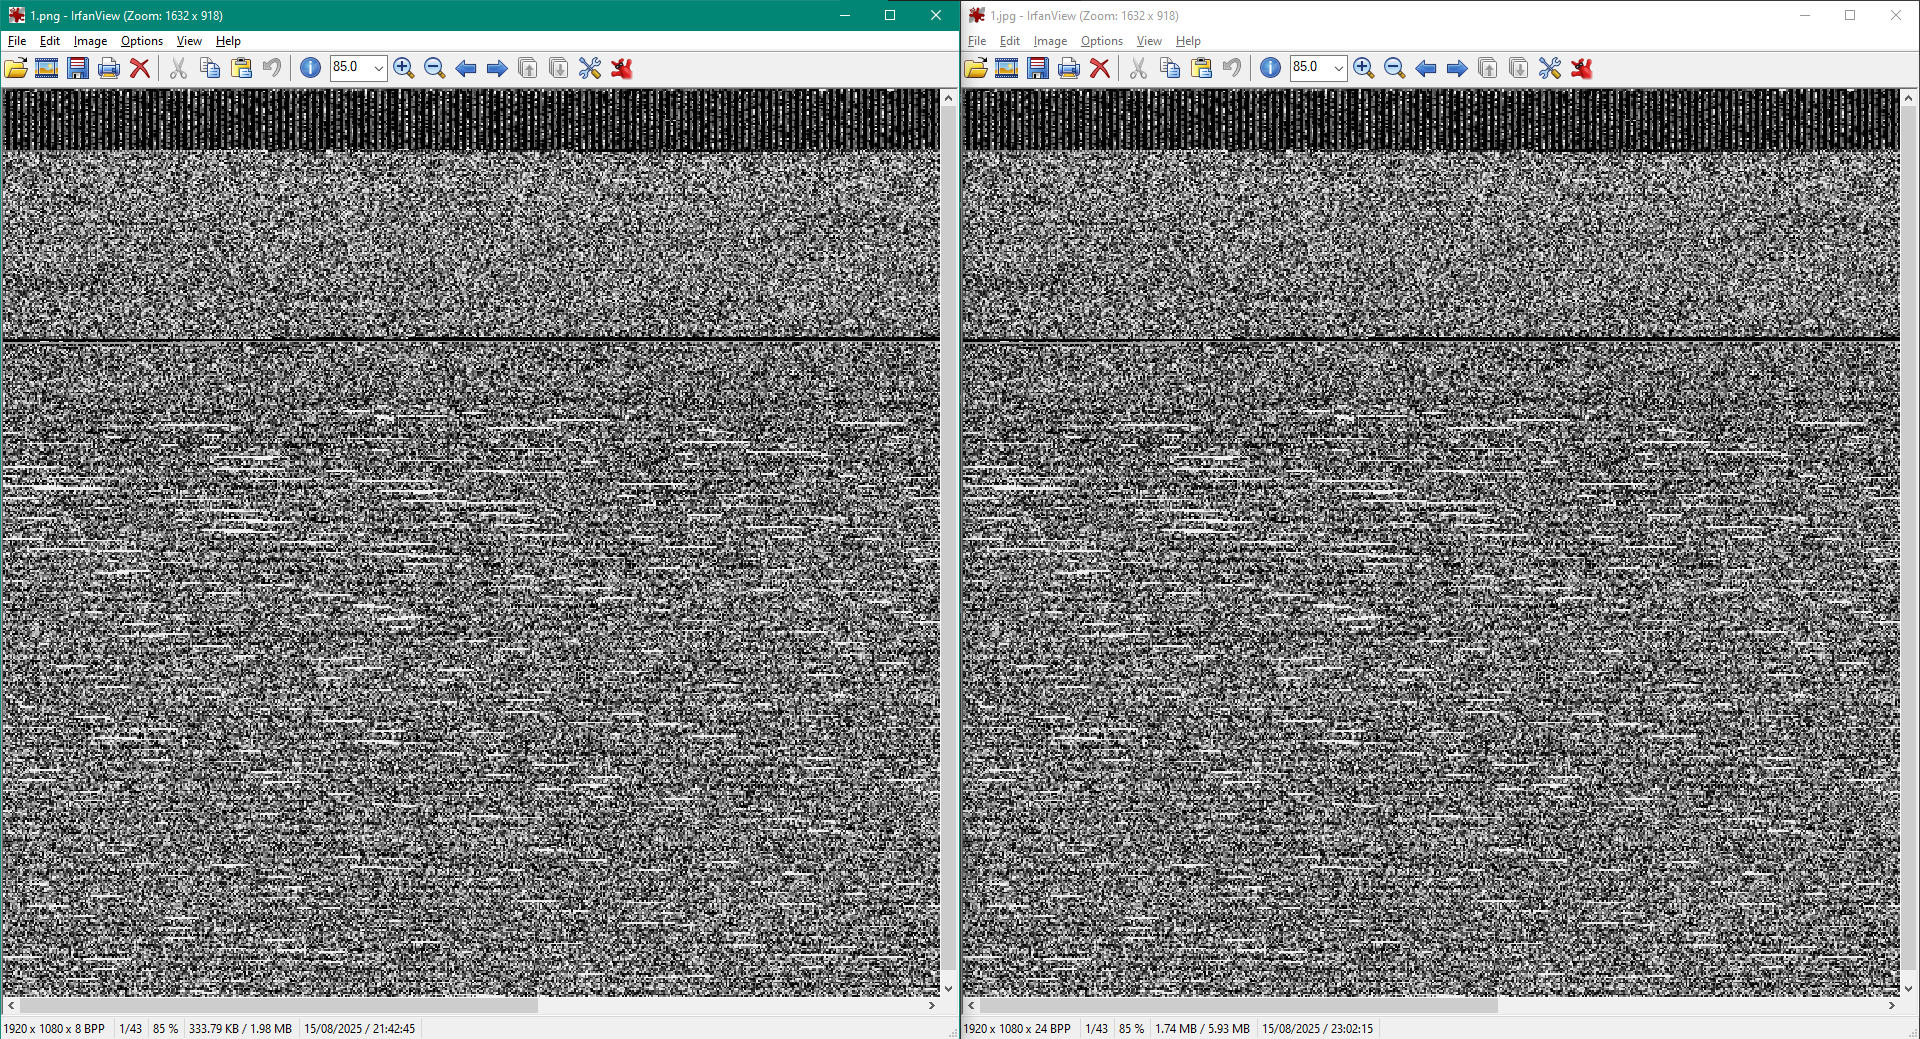 Original image generated at left, extracted from video at right. Note at bottom left in both windows how the original image has 8 bit per pixel (greyscale), and the right, 24 BPP (RGB)
When creating the video, it does convert the frames to colour instead of greyscale, and in those kind of conversion there are floating points operations, and that means a possible loss of data due to rounding errors, having a video that uses the triple of space that it should, and a overhead in colour-greyscale pixel conversion that could mean slower video generation.
What’s next?
There are error correcting algorithms that not only can detect error from a stream of data, but also can correct it, and this is done by using more bits to represent the same amount of data. I’d probably use Hamming(8,4), at least at first to try. It uses 8 bit for every 4 bit of data representation and 4 bit of data parity.
I currently don’t know what are the best algorithms to implement in this kind of project, I just know repetition codes (repeating every bit n times) and block codes like Hamming, nothing more, so I’ll stick to that until I get everything working. After that, I can try other more efficient codes and its reliability.
Postscript
After getting those compression problems using colour pixels I realize other people who done similar, using colour pixels in their projects, probably encountered similar problems, so I looked what they done, and what I found is they just dumped that raw data as images in videos without any other extra processing.
I understand why Dzhang314’s approach is in that way, as they are just storing Wolfram Mathematica data points and you don’t need those numbers to be absolutely perfect, but what it is completely absurd is the huge amount of coding “tutorials” and weblogs I found around the Internet shamelessly copying the approach of Adam Conway’s, without even naming them or how him describe that code as a ‘proof of concept’.
His ‘proof of concept’ wasn’t useful to me as it copy all data to encode to RAM, it make a 1080p 62Mbit/s video, and uses around 50 times the original file, so no, I needed to make a better alternative to all what I see.
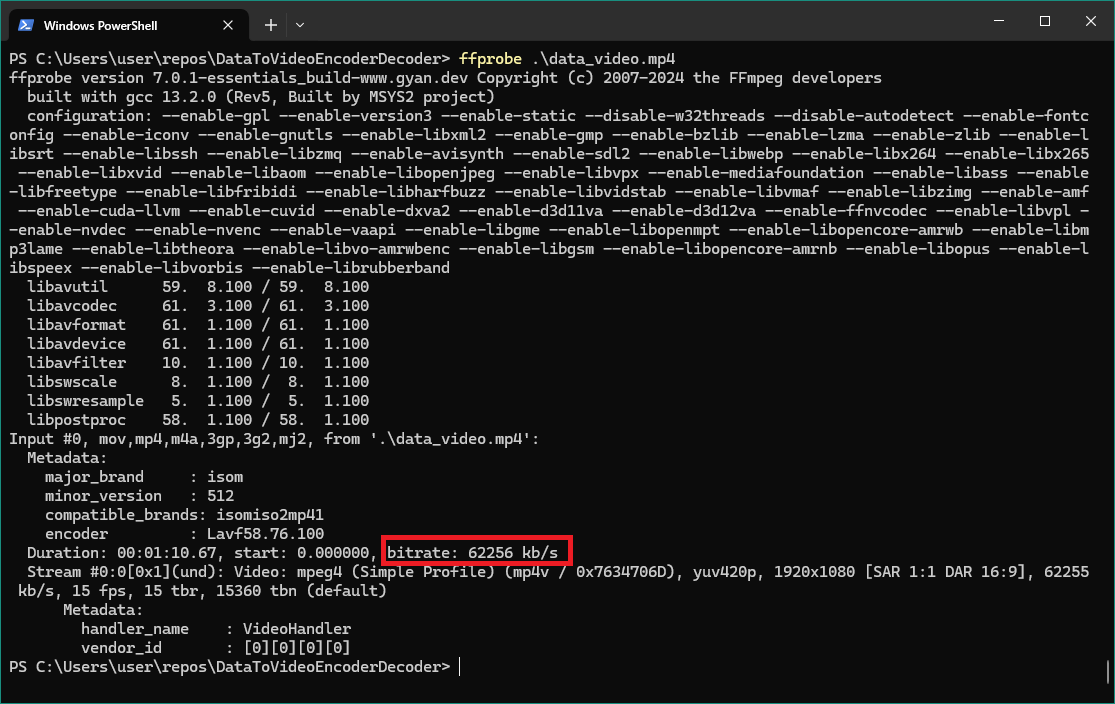 Yikes!
The original idea of all of this was shown in this Hackaday article, but DvorakDwarf, its creator, deleted the project from GitHub. I found an archived version in Internet Archive, but I had some Rust dependencies problem while compiling it, so I probably will have to analyse its code instead of using it, but not before completing my own version :-)